

| R T M M - D I S P A T C H E S |
The following are "manual" dispatches" that work like trip tickets, not to be confused with RTMM Automated Dispatches. Starting Points for Dispatches are on the Way Points Table (R-number) |
| Manual Dispatches Table for FSX/P3D | ||
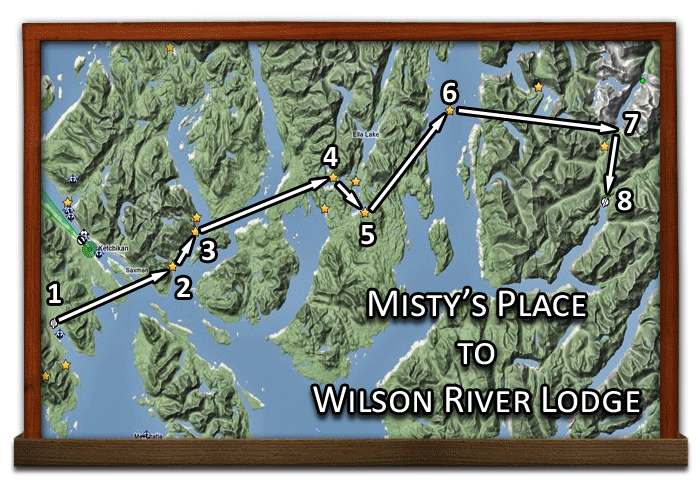
Map |
Description |
View |
| Misty's Place to Wilson River Lodge | ||
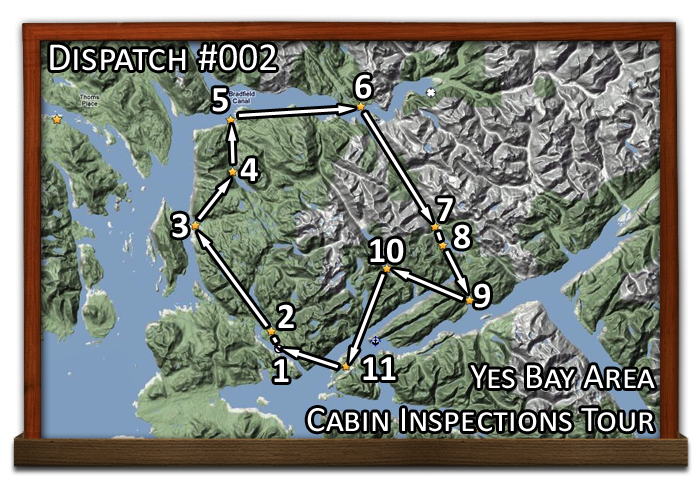
| Cabin Inspection Tour - Yes Bay Area Locations | ||
| Cabin Inspection Tour - Ketchikan Area Locations | ||
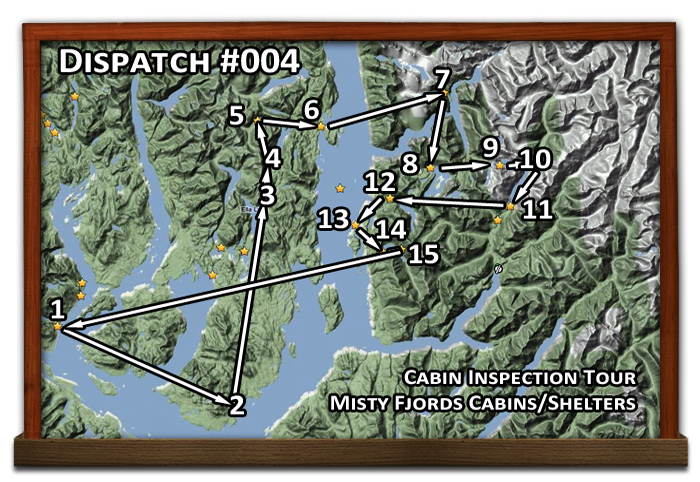
| Cabin Inspection Tour - Misty Fjords Area Locations | ||
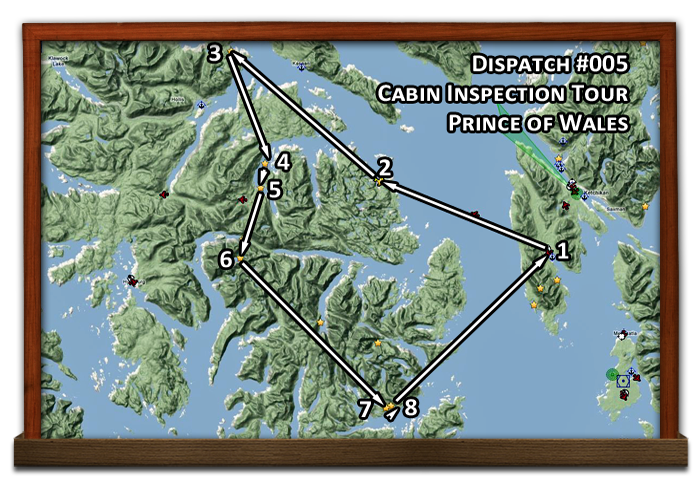
| Cabin Inspection Tour - Prince of Wales Island Locations | ||
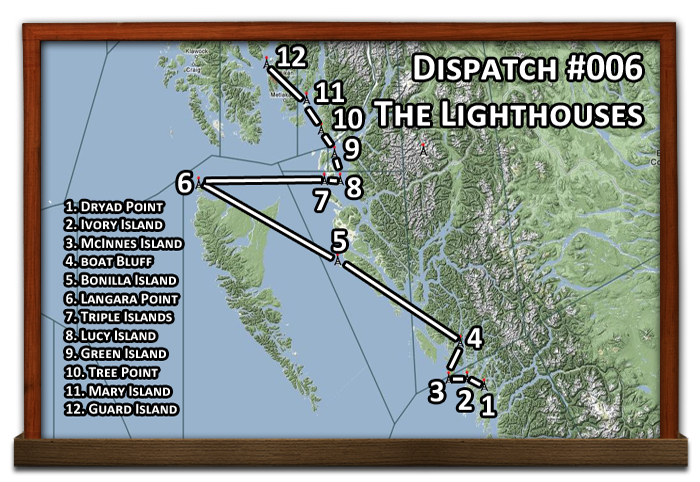
| Touring the Misty Fjords Area Lighthouses | ||
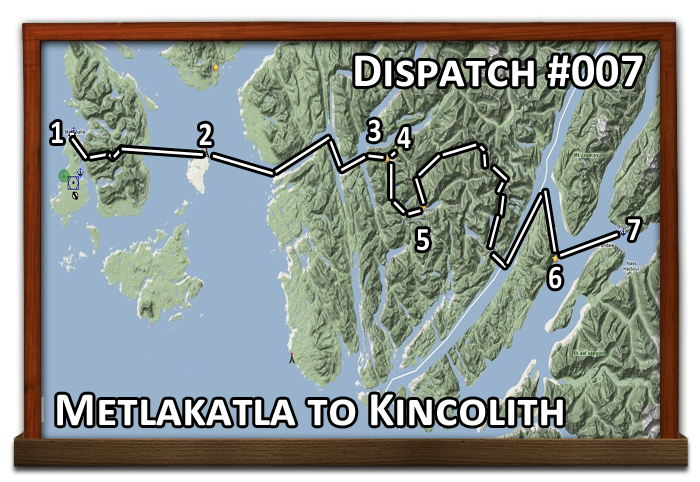
| Metlakatla to Kincolith | ||
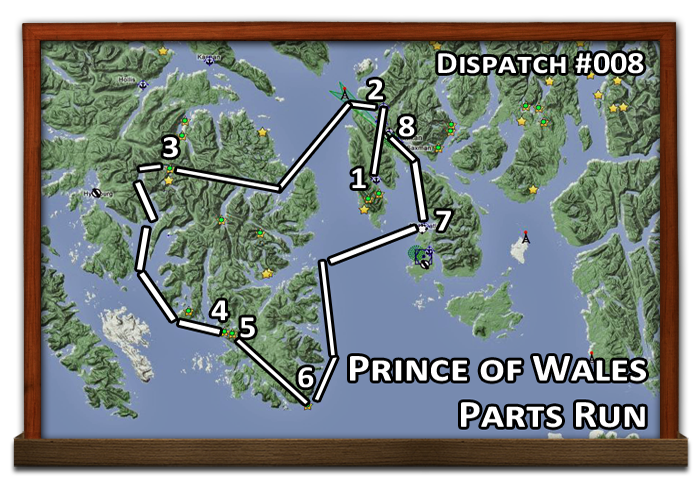
| Supply Parts Run - Prince of Wales Island | ||
| Touring the Pacific Coastal Communities of Tongass Fjords | ||
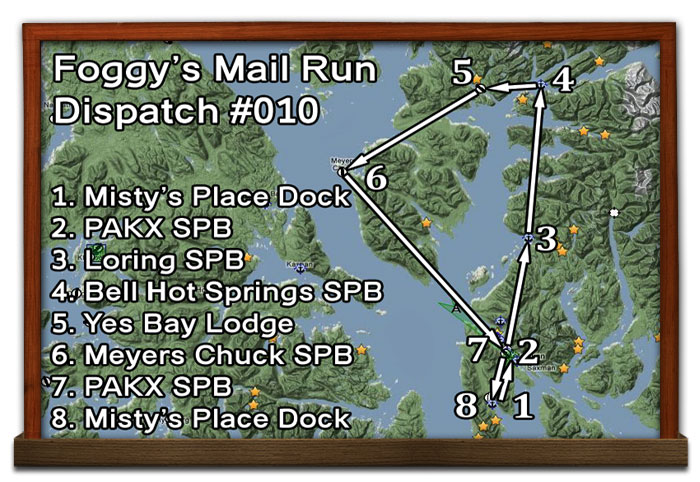
| Foggy's Mail Run | ||
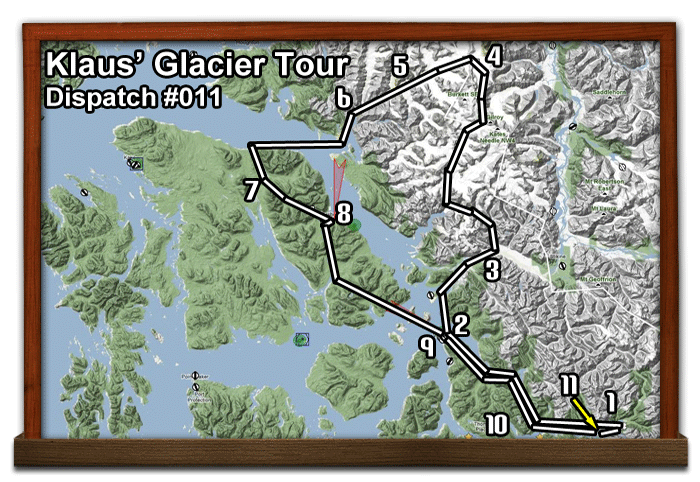
| Klaus' Glacier Tour | ||
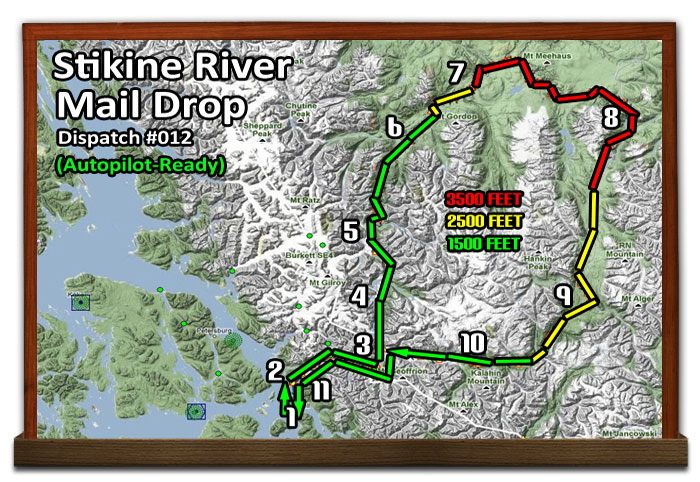
| Stakine River Mail Drop | ||
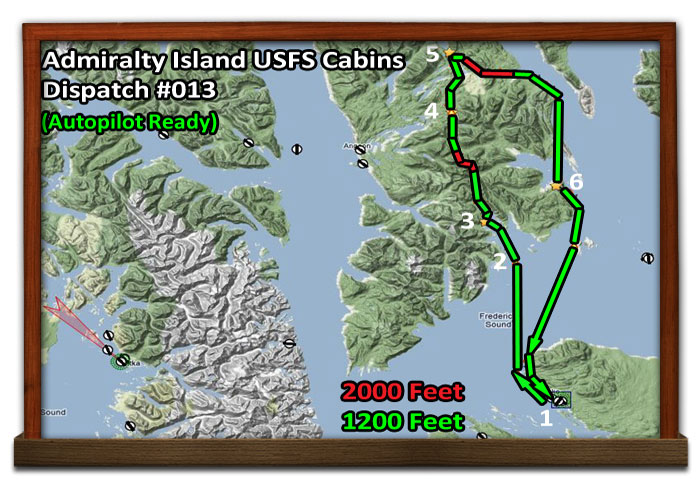
| Cabin Inspection Tour - Admiralty Island Cabins | ||
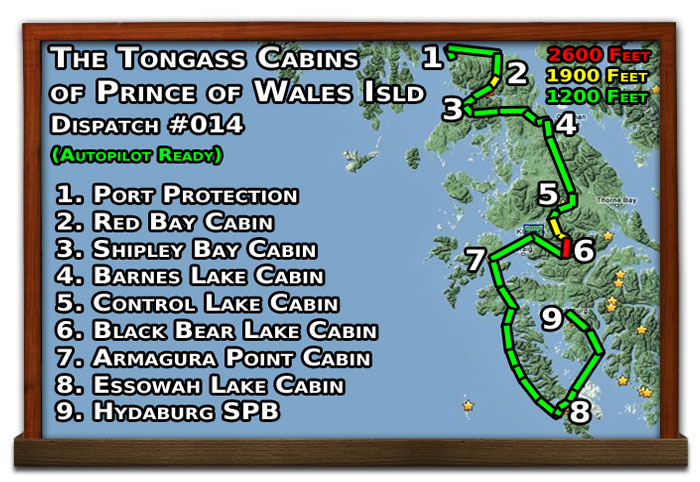
| Cabin Inspection Tour - The Tongass Cabins | ||
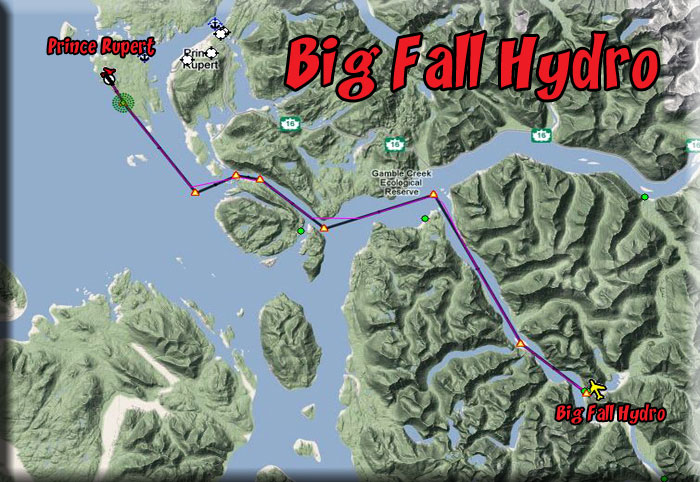
| Parts Supply Trip - Prince Rupert to Big Fall Hydro | ||
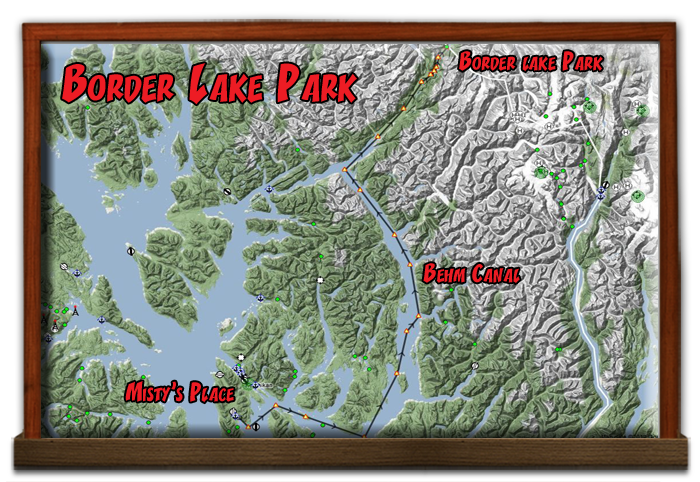
| Passengers - Misty's Place to Border Lake Park (Behm Canal Trip) | ||
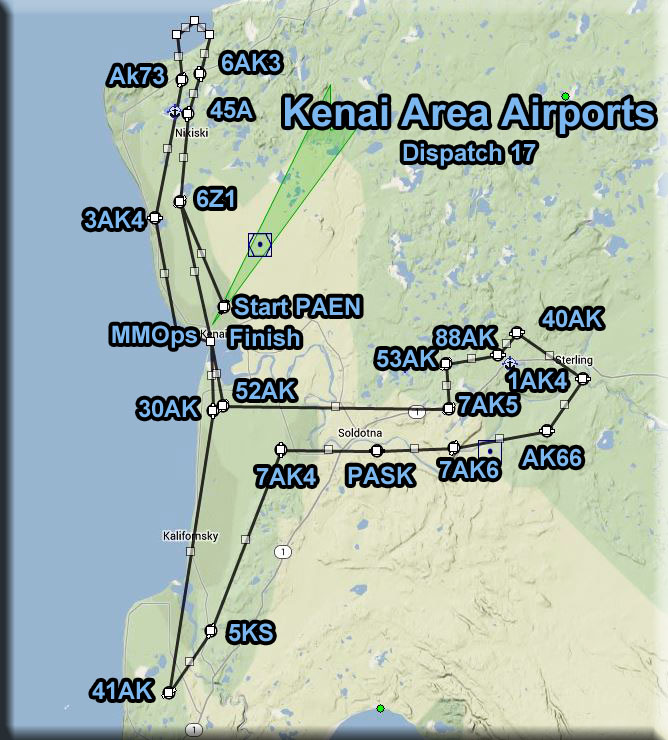
| Kenai Area Airports Dispatch | ||
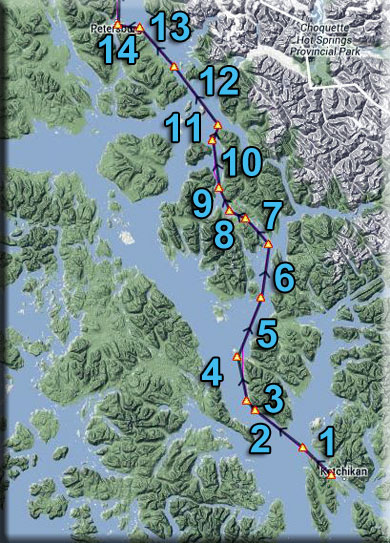
| Northern Connections 1 - Ketchikan to Juneau | ||
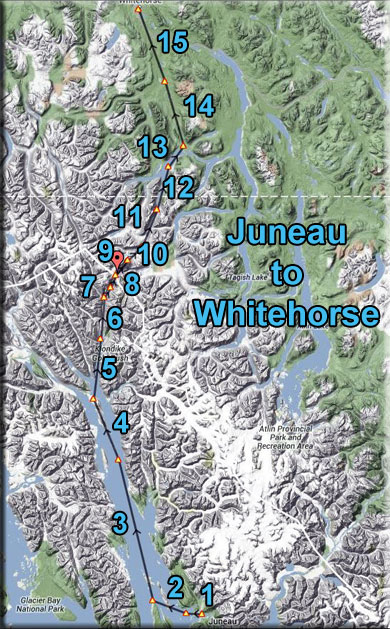
| Northern Connections 2 - Juneau To Whitehorse | ||
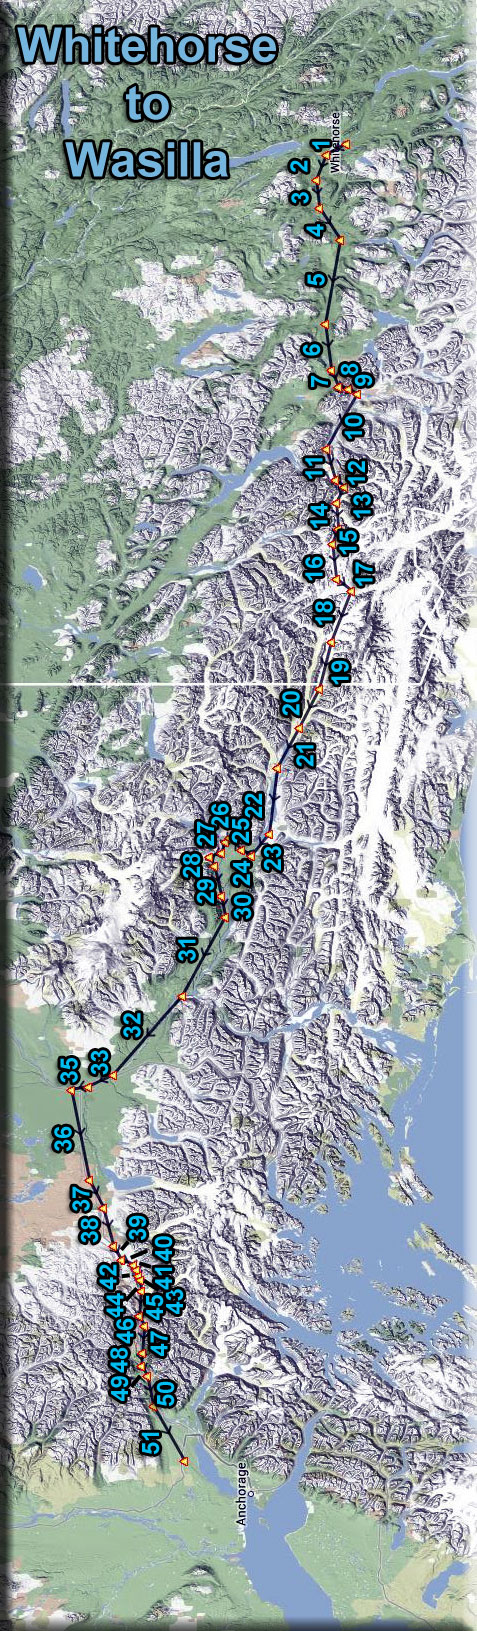
| Northern Connections 3 - Whitehorse to Wasilla | ||
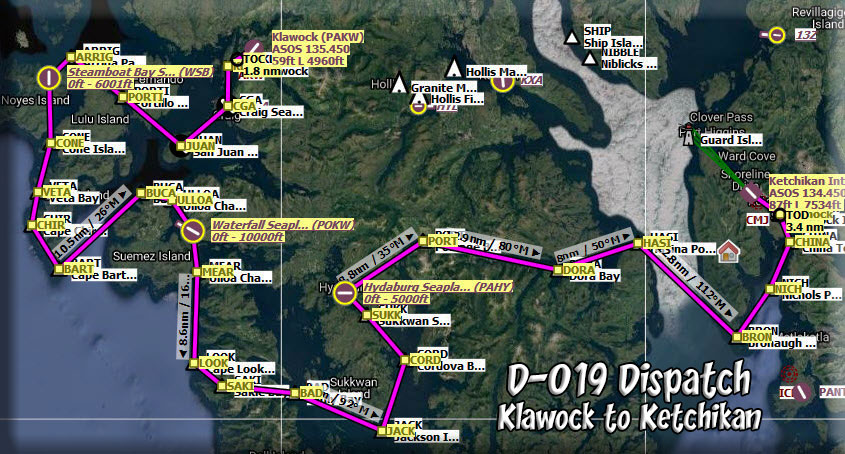
| Klawock to Ketchikan - SPBs and route in western RTMM area | ||
| Back to Top | ||
| Installing FS2020 Dispatches |
|
| Manual Dispatches Table for FS2020 | |||
Map |
PLN | Description |
View |
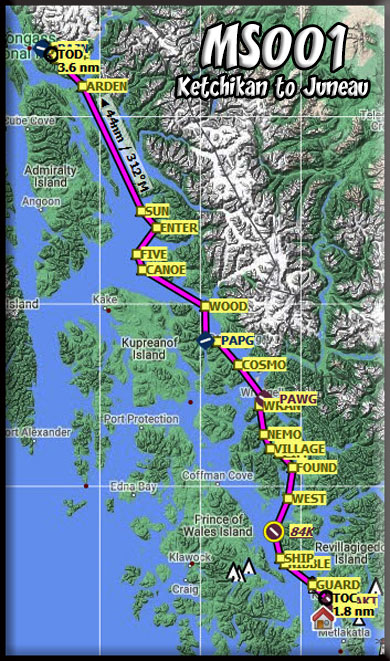
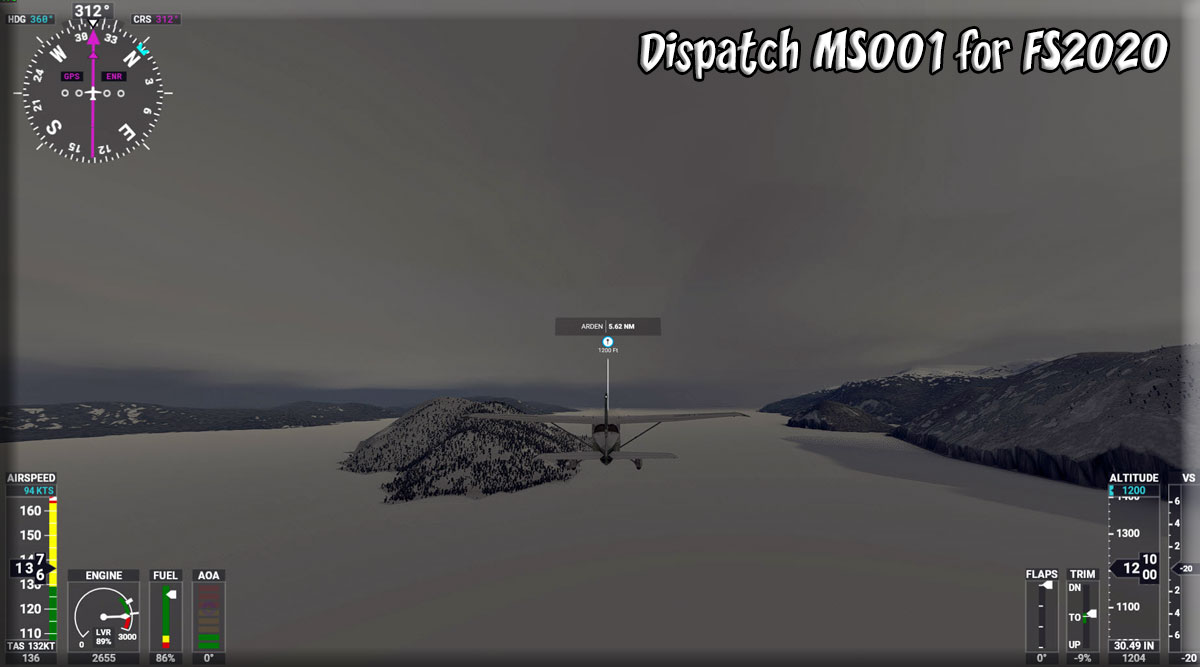
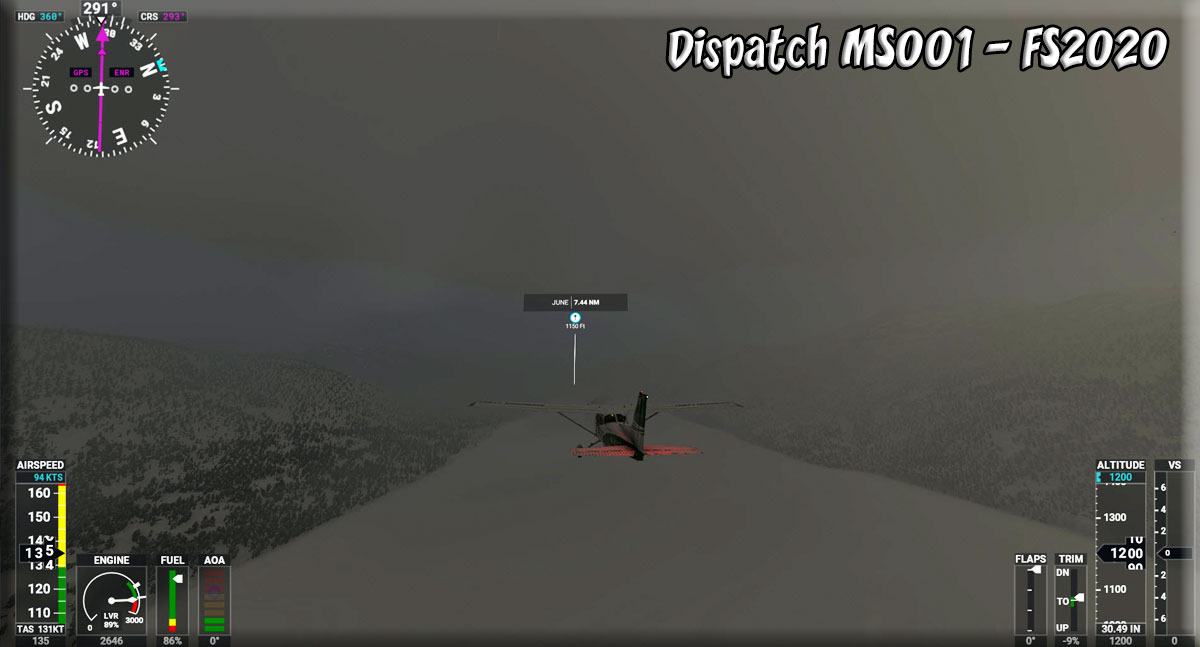
| MS001 | Zip | Ketchikan to Juneau - VFR 1200' (Screen1 Screen2 | View |
| Zip | Klawock to Ketchikan -VFR-Apprx 1200' | ||
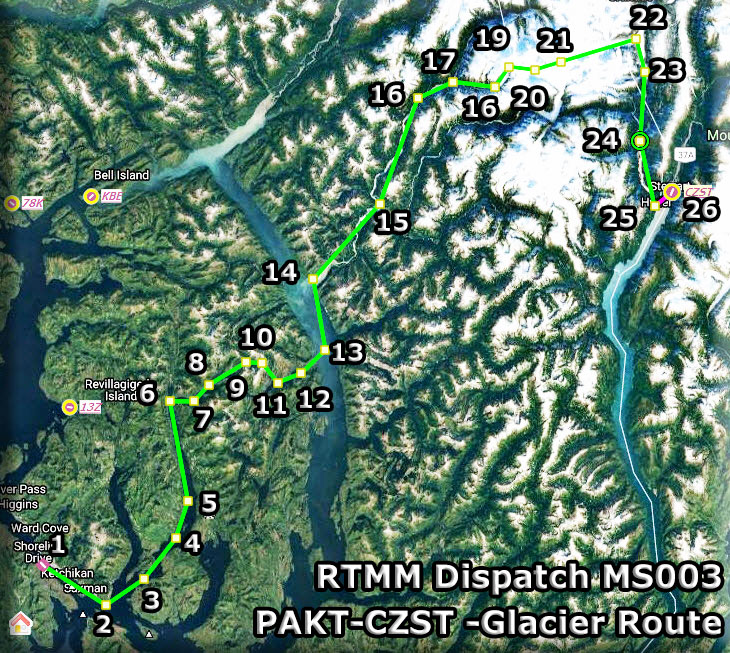
| Zip | Ketchikan to Stewart BC via the Glacier | ||
MS004 |
ZIP | Mirror Lake Fishing Trip - Ketchikan Area | |
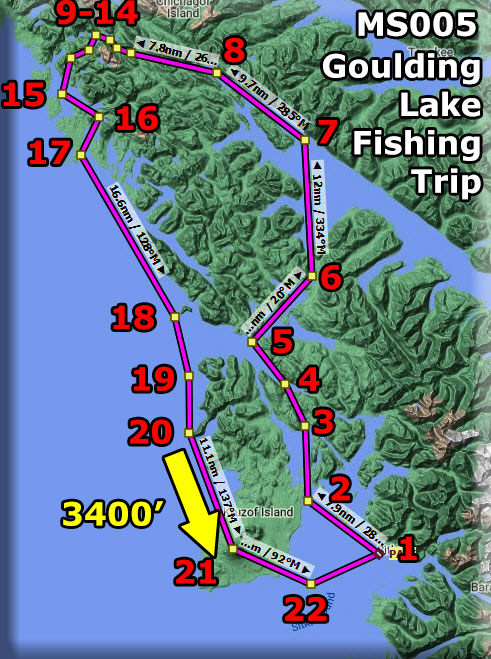
| ZIP | Goulding Lake Fishing Trip - Sitka Area | ||
| Back to Top | |||
| Using the Version 1 Dispatches | |
 |
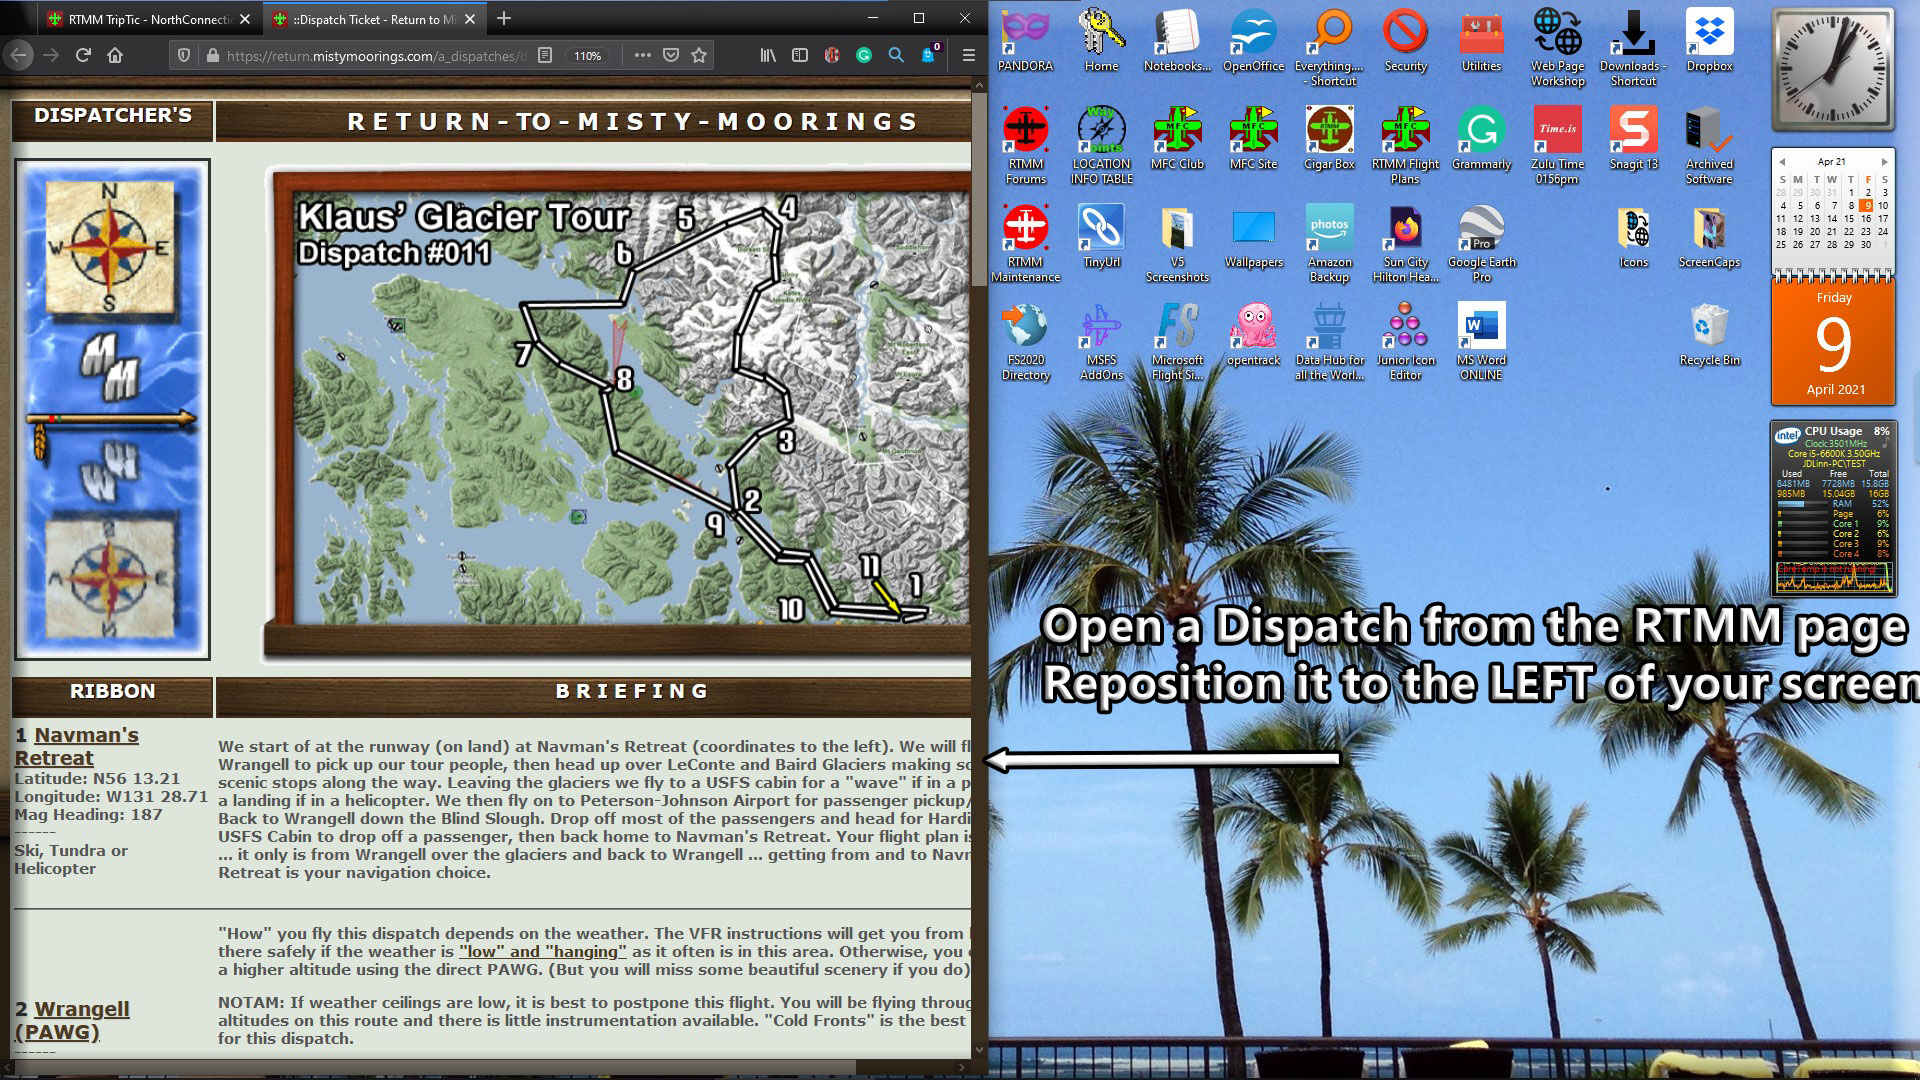
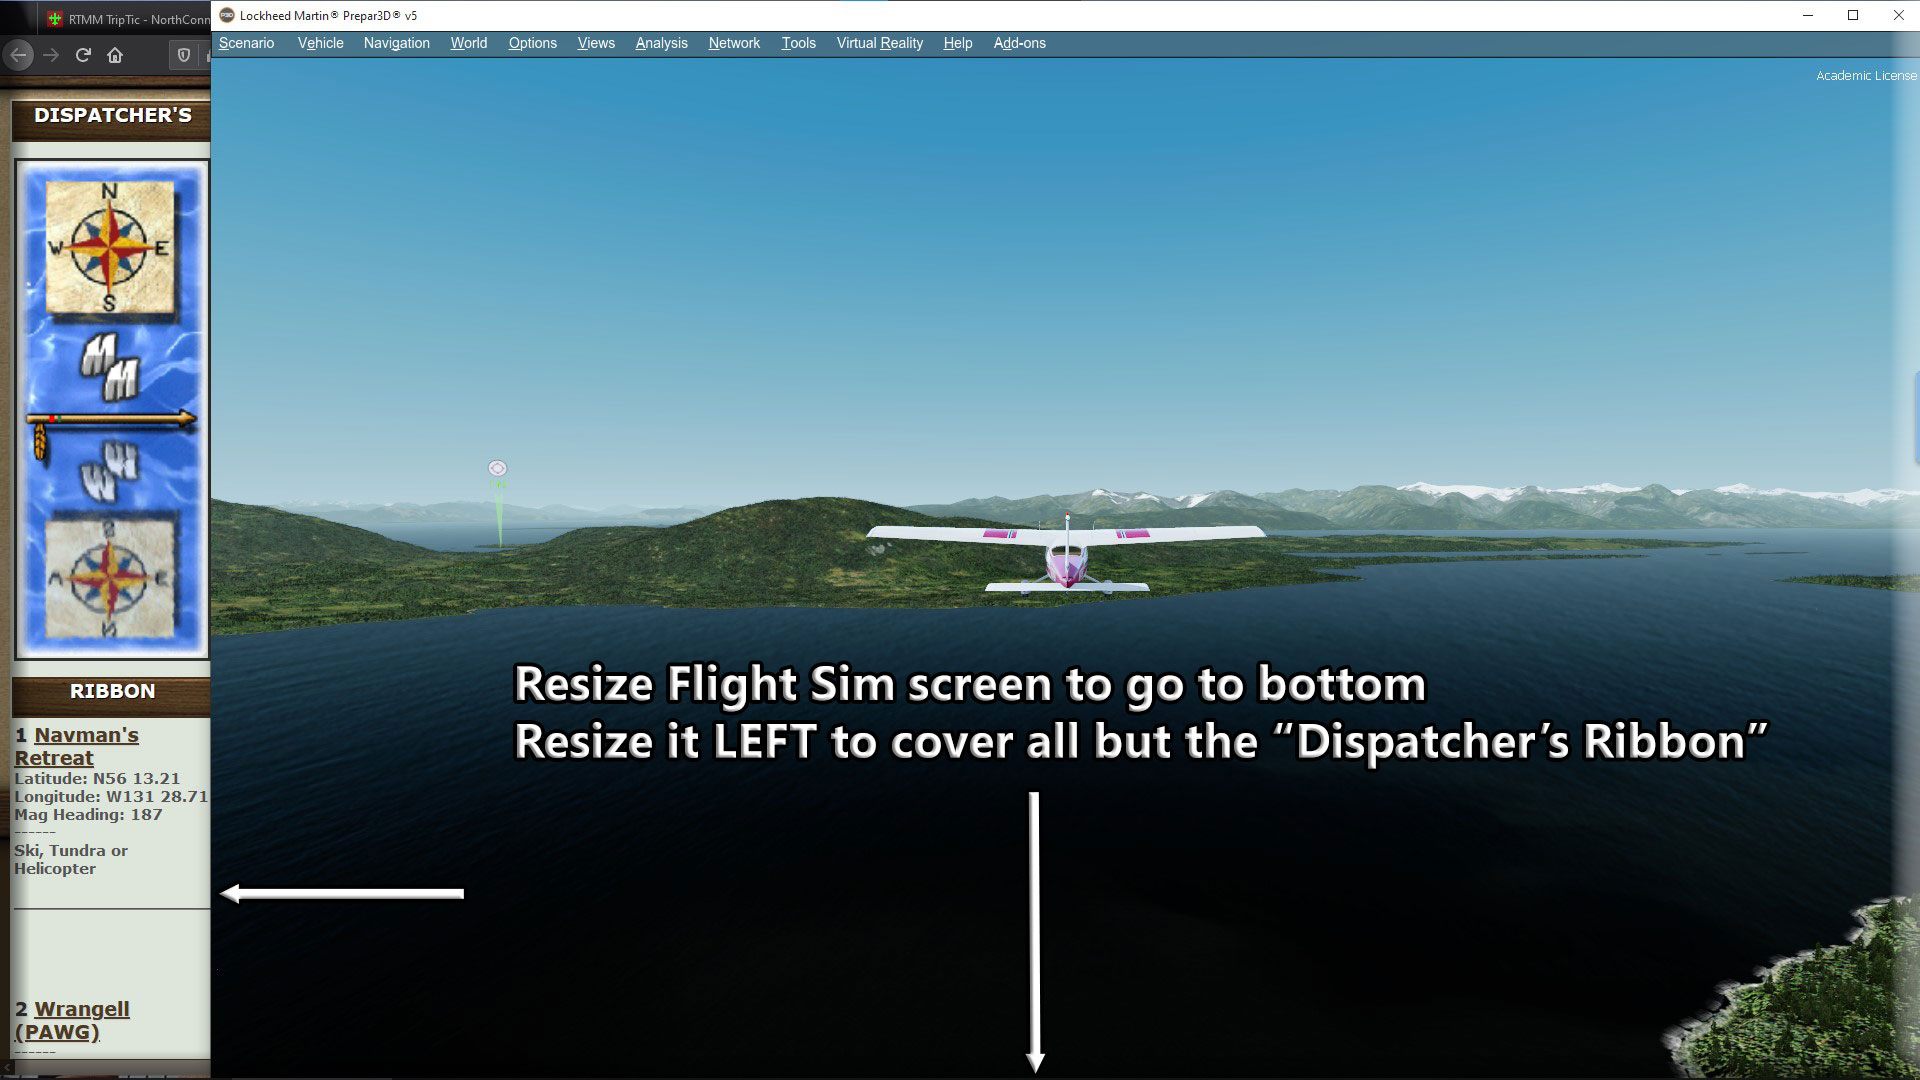
When you open a dispatch, you will see a full web page, and at first it doesn't make a lot of sense. But here's what you do. Go to the upper right corner of your browser and click on the little square (not the "-" and not the "x". Then resize your window from the left edge pulling to right so only the Dispatcher's Ribbon is showing ... to the right of your desktop. Move this window to the right edge of your screen and adjust it as you see below.
Click Image to Enlarge |
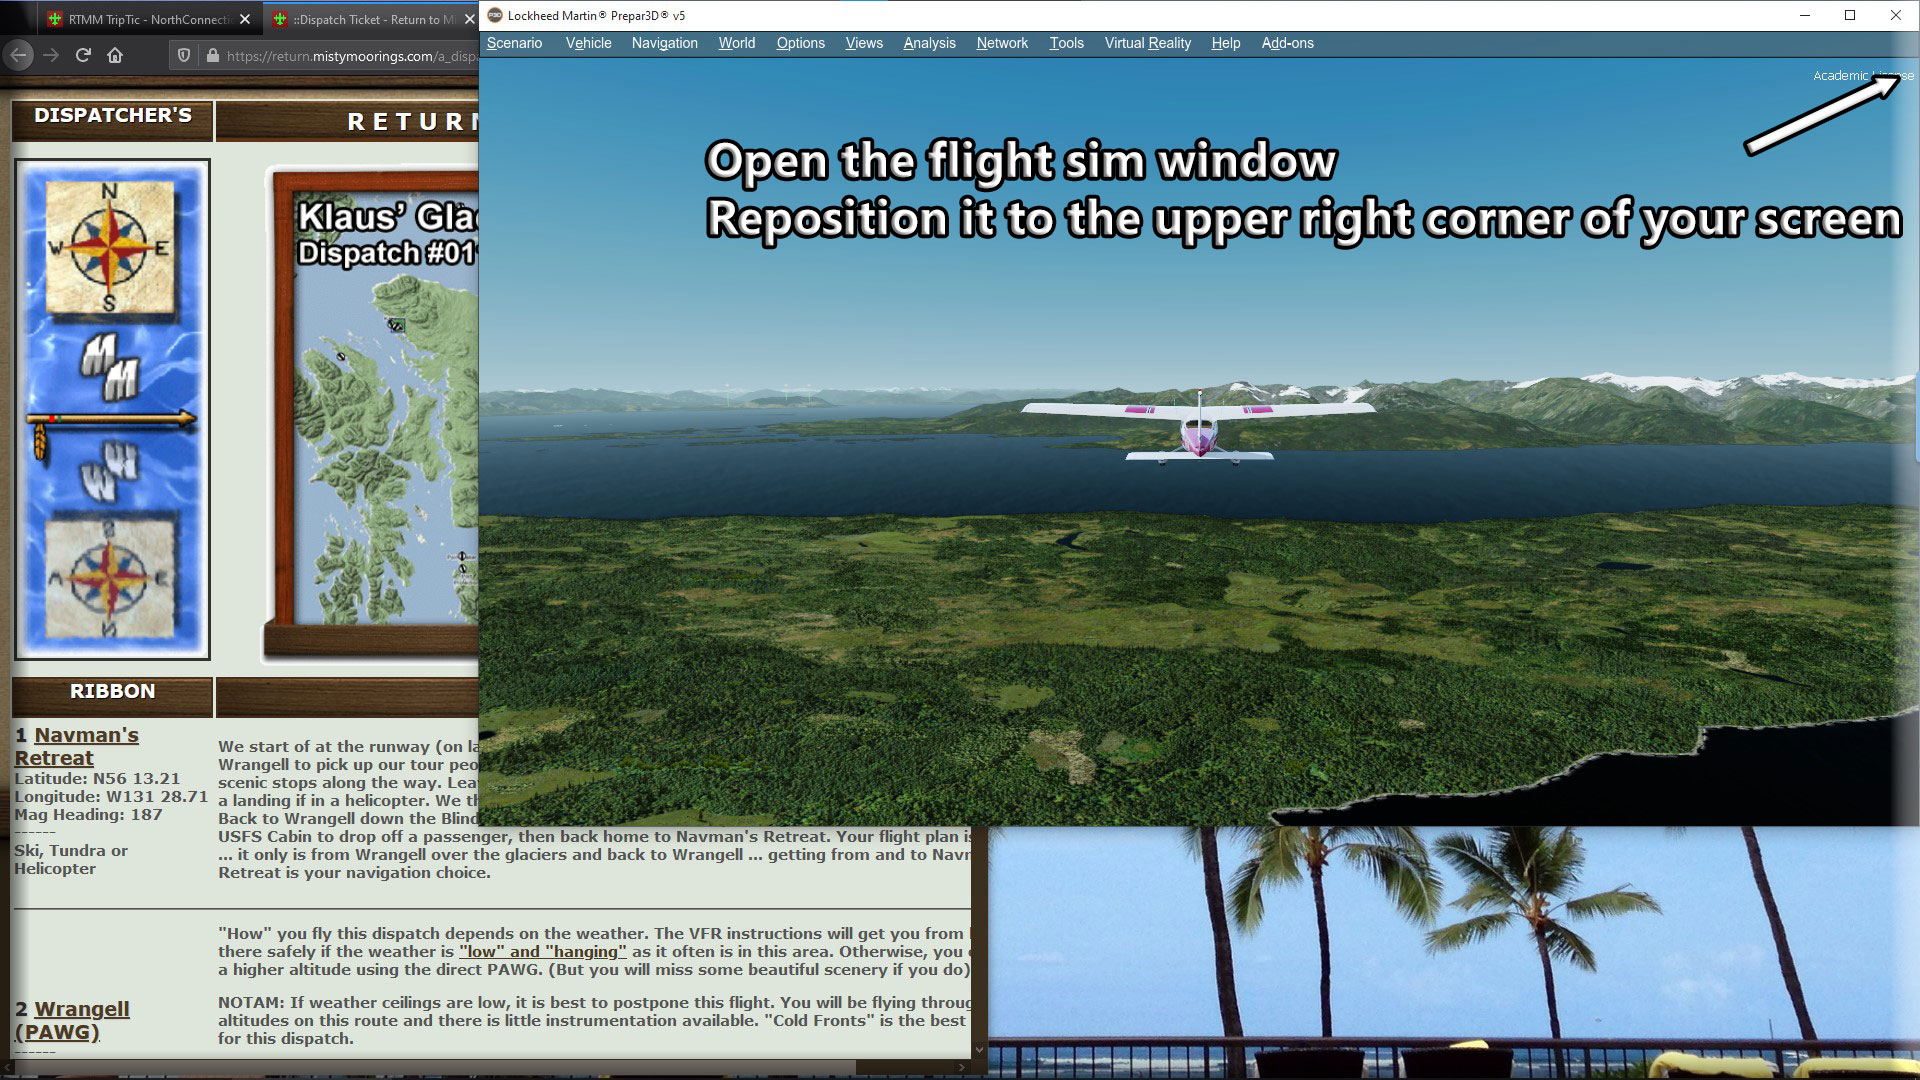
Now you resize your flight simulator window placing it as you see above. You are not "cutting off" any of the screen. Most of the time you will be able to just use the headings depicted on the ribbon to help you navigate the dispatch. But if you need the map or would like some commentary on the leg, perhaps some navigational tips, then you grab the left edge of the Dispatcher's Ribbon with your curser and drag it to the left over the Flight Sim screen ... read what you want, check your map, then drag that edge back to hide the map and comments.
Click Image to Enlarge
Click Image to Enlarge When finished, when you click on the ribbon, the whole dispatch window opens and you can read the information and instructions. Clicking on the Flight Sim window, reopens the flight sim and reduces the dispatch to onlly the Dispatcher's Ribbon. |
|
NOTAM: There is an information table at the bottom of each dispatch. If there are any irregularities about the dispatch, you will find the information there. We used to put what scenery locations you would need for the dispatch. But with the new RTMM Express Setup, you will hav all of the scenery locations. |
|
| Back to Top | |
| Using the Version 2 Dispatches | |
|
VIDEO on How to Use the V2 Formatted Dispatches When you open a dispatch, you will see a full web page, and at first it doesn't make a lot of sense. But here's what you do. Go to the upper right corner of your browser and click on the little square (not the "-" and not the "x". Then resize your window from the left edge pulling to right so only the Dispatcher's Ribbon is showing ... to the right of your desktop. Move this window to the right edge of your screen and adjust it as you see below.
Click Image to Enlarge |
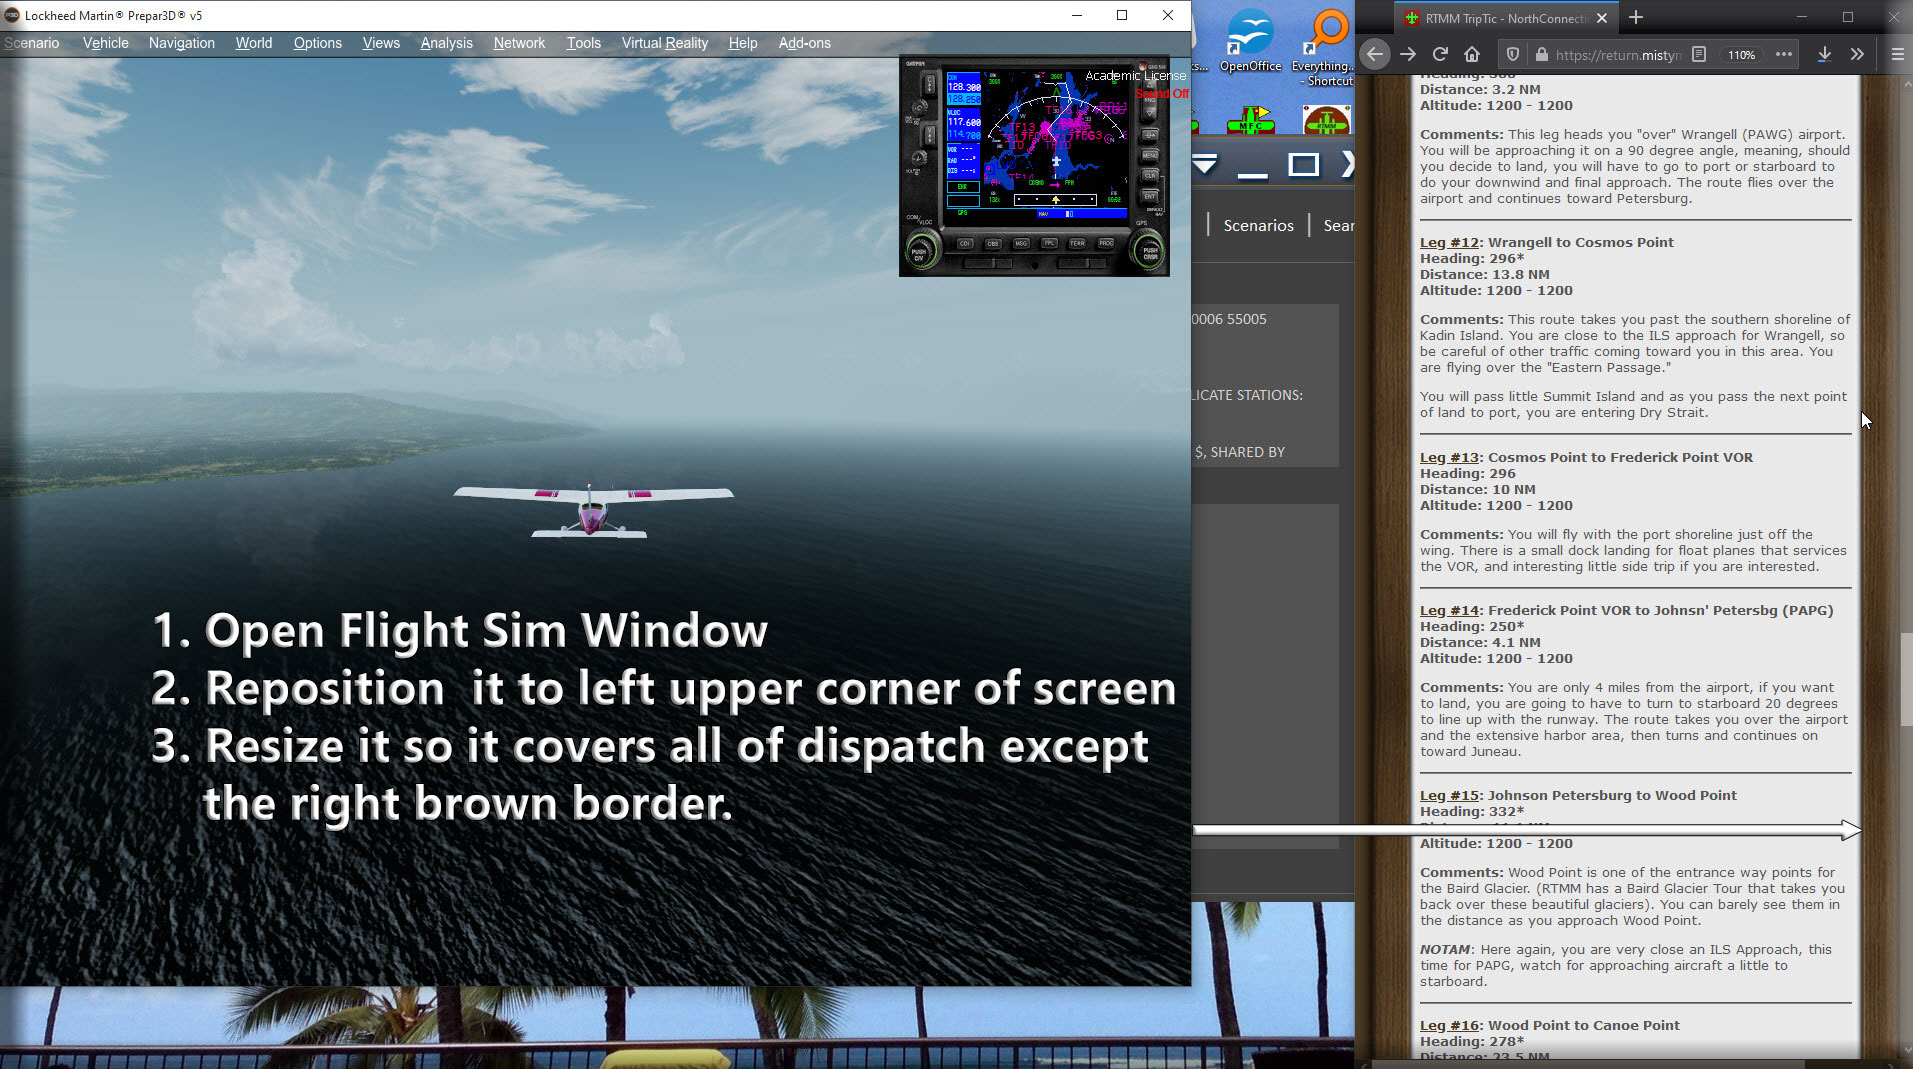
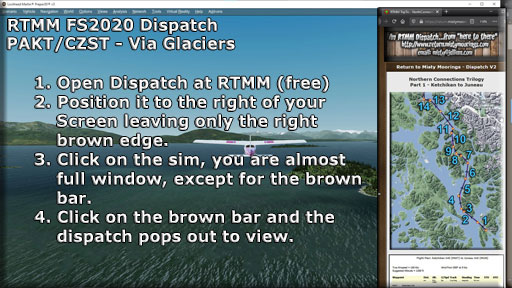
Open your Flight Simulator window. Reposition it to the upper left hand corner of your screen, then resize the window down and to the right to cover all of the dispatch window except the right hand brown edge.
Click Image to Enlarge
Click Image to Enlarge Now, when you click on the brown border, the dispatch opens and you can read the instructions and information. Click again on the Flight Sim window, and you have almost a full screen except for the dispatch right brown edge. |
|
NOTAM: There is an information table at the bottom of each dispatch. If there are any irregularities about the dispatch, you will find the information there. We used to put what scenery locations you would need for the dispatch. But with the new RTMM Express Setup, you will hav all of the scenery locations. |
|
| Back to Top | |

| VIDEO - How to Use the V2 Format Dispatch (Click on Video to Play) | |
| To Summarize: You fly with only the brown right-hand border of the dispatch showing. But if you click on that border, it brings out the dispatch to read and manipulate. Then click on the Sim window and the dispatch disappears, all but the brown border. | |
| Back to Top | |
| Visible Locations in FS2020 | ||
| Here is is list of locations found in the RTMM area that are visible or invisible - click on "view" to see the location's scenery objects. | ICAO | Name | VIEW |
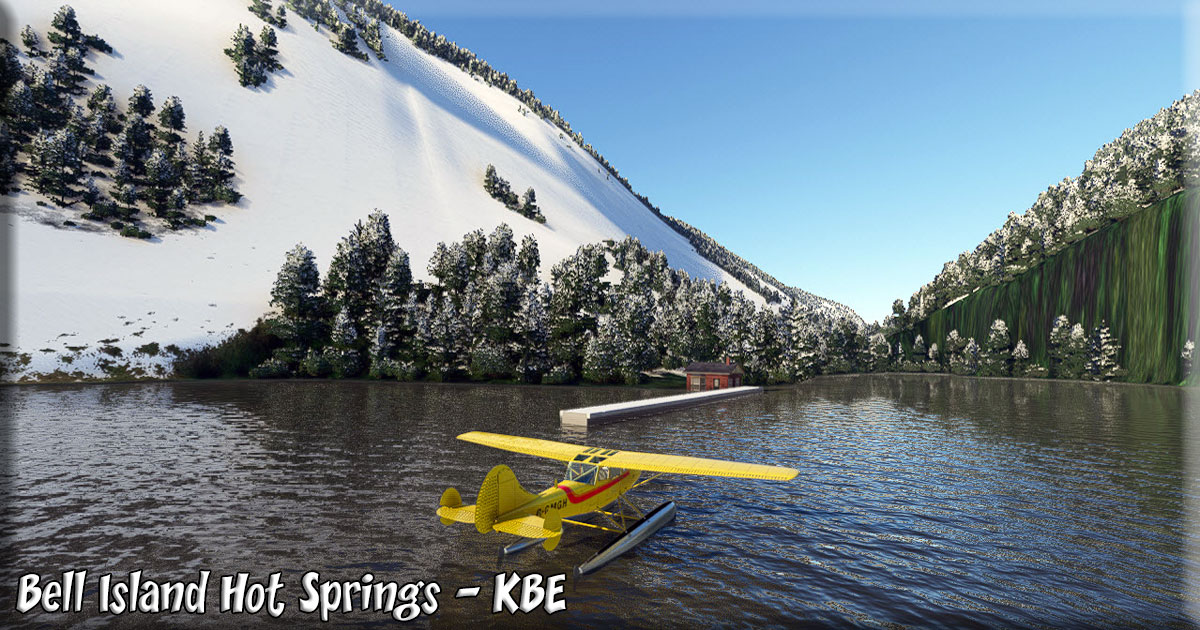
| KBE | Bell Island Hot Springs | View |
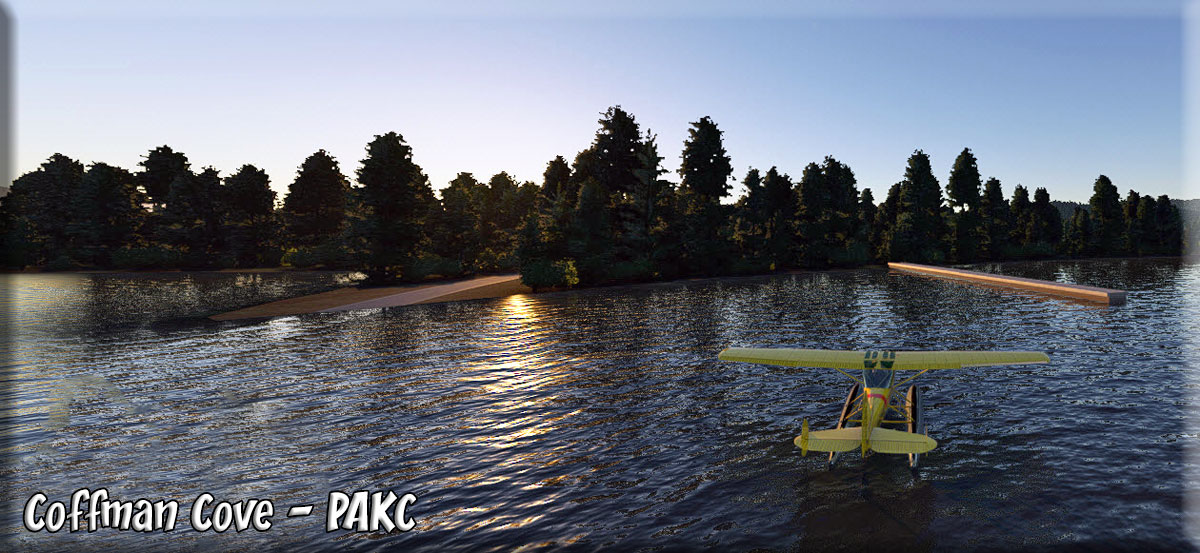
| PAKC | Coffman Cove | View |
| CGA | Craig | View |
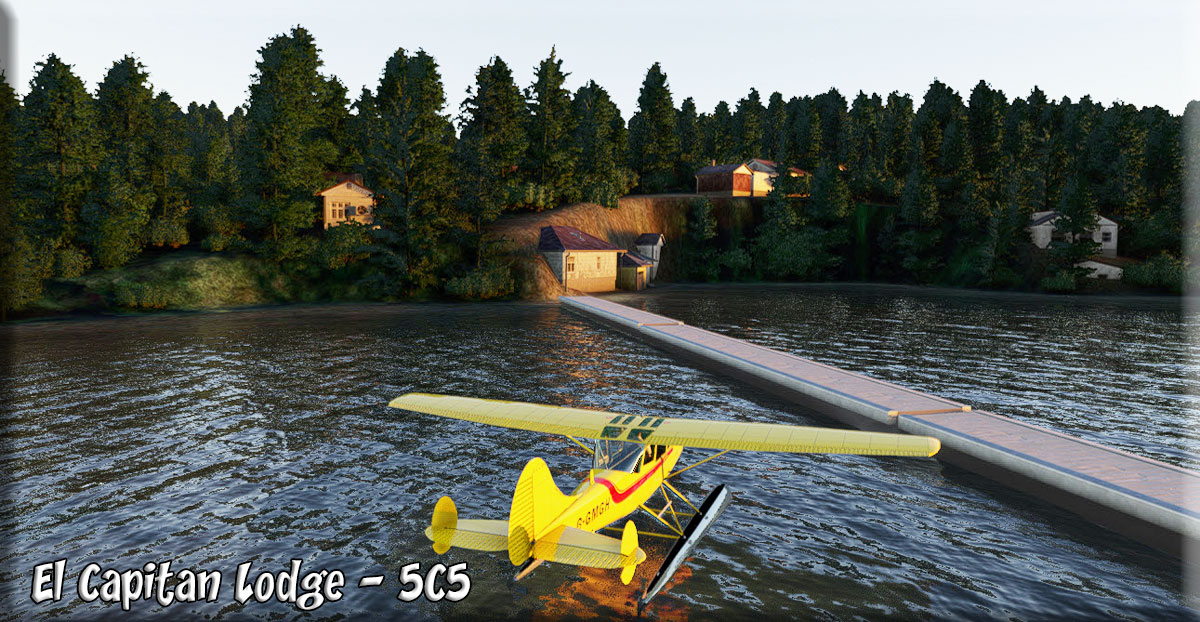
| 5C5 | El Capitan Lodge | View |
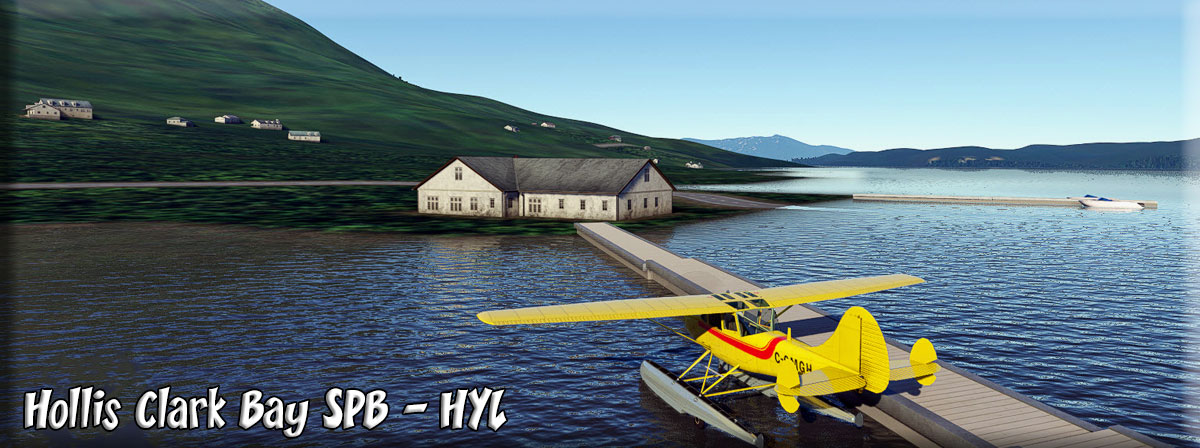
| HYL | Hollis | View |
| KXA | Kasaan | None |
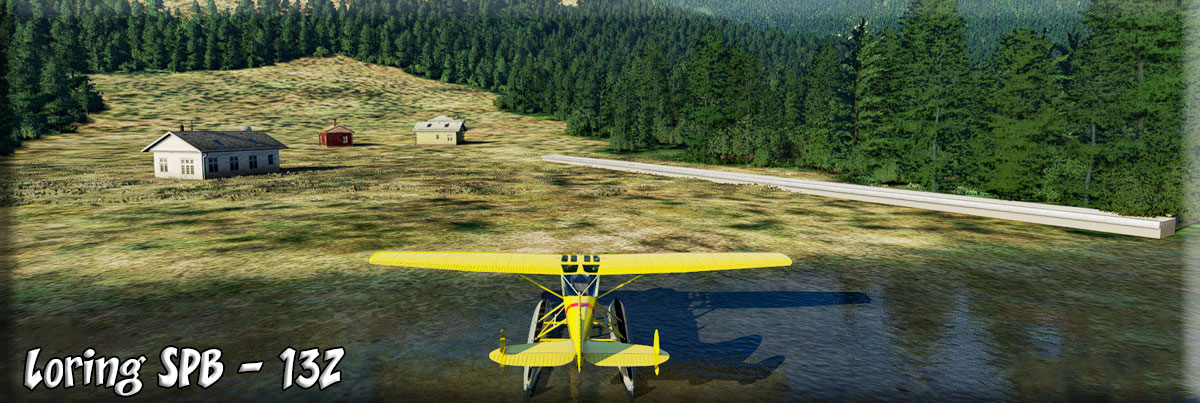
| 13Z | Loring SPB | View |
| 84K | Myers Chuck | None |
| AK62 | Naukata Bay | None |
| 16K | Port Alice | None |
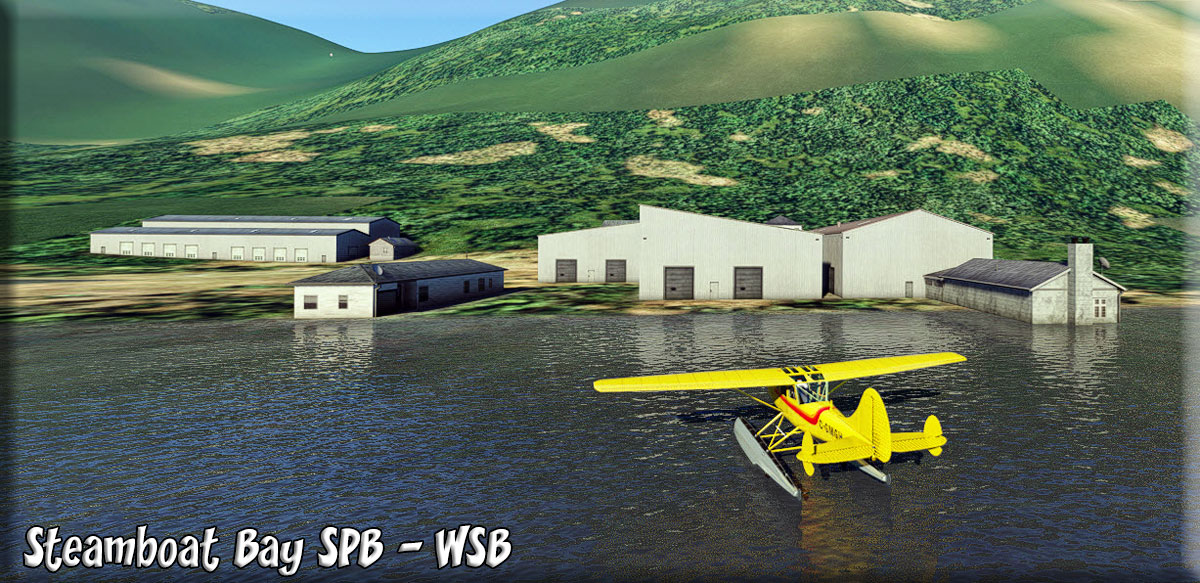
| WSB | Steamboat Bay | View |
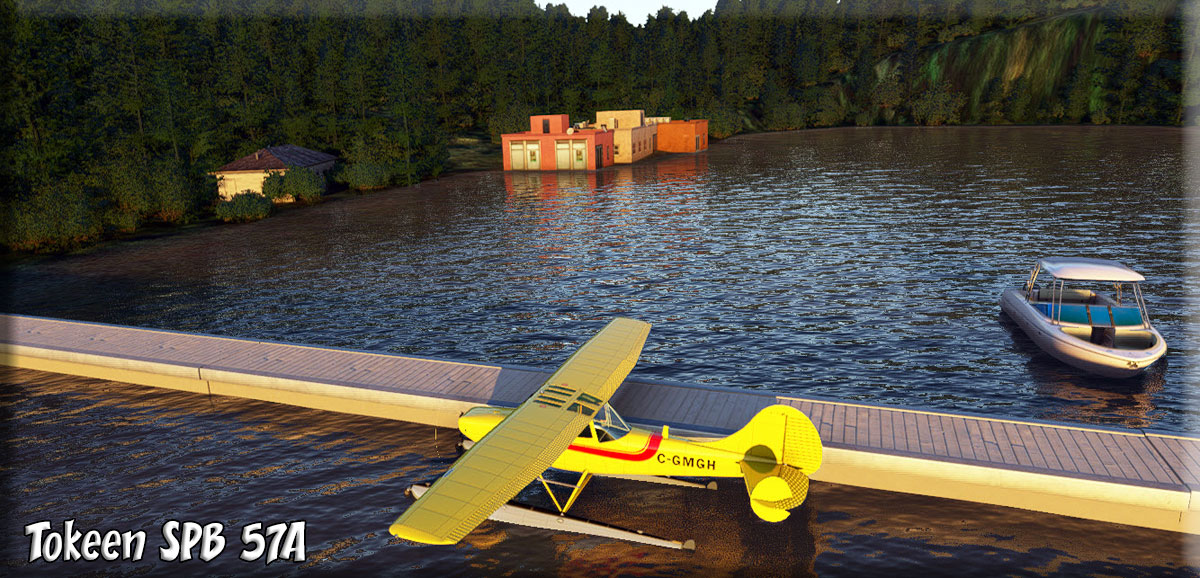
| 57A | Tokeen | View |
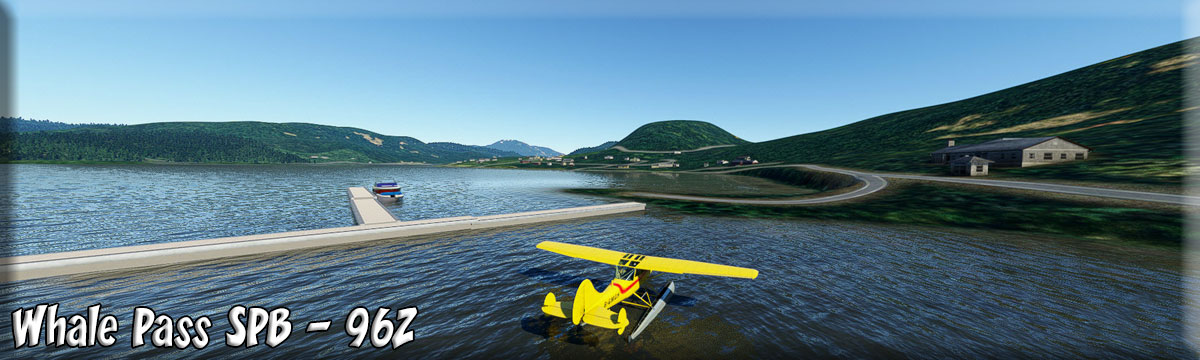
| 96Z | Whale Pass | View |
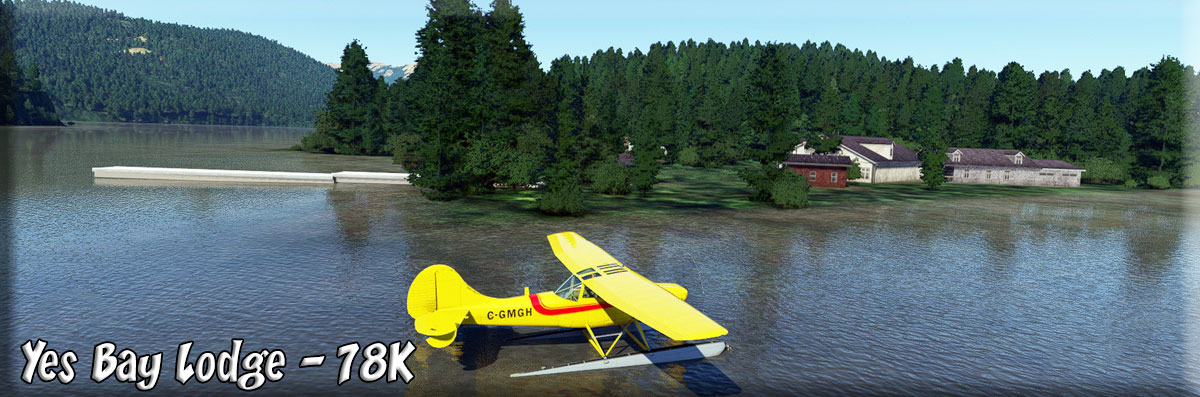
| 78K | Yes Bay Lodge | View |